Below are directions and notes on how I made a pell. I took some info I had seen on various webpages, some advice from others and my own VERY limited carpentry skills and combined it all togther. I will post some real photos of my completed pell in a few days.
--> Please note, BE VERY CAREFUL WITH DRILLS AND SAWS. YOU COULD HURT YOURSELF BADLY, ONLY DO THIS IF YOUR REASONABLE COMFORTABLE WITH POWER TOOLS!!!! <--
To start cut your 12' length of treated 4x4 in half with the circular saw, with most saws you will have to cut twice. The blade will only cut about two inches deep into the 4x4 so cut through totally once, then flip it around and cut along the same line. This should leave you with 2 6' lenghts. One will be the body of the pell and 6'0 is a good average height for an opponent. The other 6' section will cut up again to make the base.

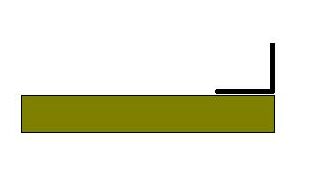
Take the straighter of the two pieces and set that one asides for the body. Now the braces of the body can be cut. Take your 6' section and measure it. At every 18" mark make a line across the wood. This should leave you with 4 1.5' sections, these will be your braces. So go ahead and cut the peices out and then get your L brckets ready. These will be the connectors from your braces to your pell. Make sure you line up the edge of the bracket pointing up and the edge of your braces. This will ensure that both the brace and the bracket are flush against the body when you attach them. Also centering your bracket on the brace will maximize its strength. Once you are happy with the placement go ahead and use your drill and wood screws to secure the bracket to the brace. Don't attach the bracket to the body of the pell just yet.

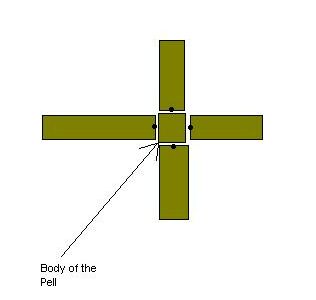
So now you should have 4 braces with brackets centered and lined up against the butt edge. These should be securely screwed down and ready for attaching the body. Places the braces in a sqaure like the picture shows and slide the body between them. I found that if I did this and pressed the braces securely against the body it would stand upright decently well while I screwed them togther. Holding the brackets tight against the body of the pell screw one in on each bracket. Once you have atleast one screw holding each bracket to the body go ahead and screw them all in and it should pull the braces tight against the body.

You should now have a pretty secure frame now that can take some punishment. Next step is to pad it down, otherwise you will destroy swords working with it. What I used was old pairs of jeans. I had three or four older pairs of jeans laying around so I cut the legs off them all and slit each one up the leg so when I was done, each leg was a flat piece of denim about 3 feet long and a foot wide. Thats perfect for wrapping the body of the pell. I wrapped the denim around the body, overlapping as I had to, starting at the top and ducttaping the fabric to the body. Then tape the bottom, then overlapping the second piece to cover the bottom of the pell then ductaping. This I did 6 times total. So when I was done I had a 3 thick denim wrapped pell, with some nasty ductaping :) Then becuase my pell will be living outside I took two heavy duty trash bags and slit them just like the pant legs and wrapped it the same way. This is to hopefully provide some waterproofing to the mix. Then to finish off the mixture, I took some double wide ducttape and starting at the top spiral wrapped my way down the entire pell. I overlapped each pice by maybe 1/2 an inch on each time I went around. I even wrapped the brackets at the bottom. I figured it couldn't hurt.
So thats my pell making story, when I was done I had a 6' pell that was well padded and (mostly) waterproof. Only time will tell though I guess about how well it stands up to taking some blows. Also I wouldn't worry if the pell isn't rock solid, alittle give and rock isn't a horrible thing, remeber your live opponents won't be standing still!
Back to the Home Page